I spent three years eating trail mix for dinner at camp because nobody told me campsite cooking could actually be good. I had a single-burner backpacking stove, a dented pot, and the vague hope that ramen would taste better in the woods. It doesn't. What changed things for me was switching to a two-burner propane setup and learning a handful of techniques that translate directly from a home kitchen to a picnic table at 8,500 feet. Now I cook scrambled eggs and bacon for six people before 7am, start a pot of elk chili at noon that's ready by dinner, and pull off stir-fry in a wok without burning everything. The Coleman Triton 2-Burner Propane Stove is the tool I reach for every trip. But the stove is only half the answer. The rest is sequencing, prep, and knowing how propane heat behaves outdoors.
This guide walks through every step I follow, from setting up your stove safely on arrival to plating a meal that doesn't embarrass you in front of your camping group. If you've been surviving on hot dogs and instant oatmeal, this will fix that.
The stove that changed my camp kitchen: Coleman Triton 2-Burner
Rated 4.7 stars across 3,500+ reviews. Two independently adjustable burners, 10,000 BTU each, with a wind guard that actually works. This is the stove Marcus uses on every trip to Colorado.
Amazon Check Today's Price on Amazon →Step 1: Choose and set up your cooking surface before anything else
Your stove placement determines everything downstream. A wobbly table is a grease fire waiting to happen. I use a 4-foot folding camp table (standard aluminum, nothing fancy) placed on flat ground away from the tent footprint. If the campsite is sloped, I find the flattest patch and shim a table leg with a piece of firewood if needed. The stove should not rock when you press on any corner.
The Coleman Triton unfolds flat and locks open. Check that the latch mechanism clicks into place on both sides before you set anything on it. The folded lid doubles as a wind guard on three sides, which matters more than you'd think above 7,000 feet where wind is constant. Orient the stove so the open side of the wind guard faces away from the prevailing breeze. If you're in a site with no wind pattern, face it away from your food prep area so heat blows away from you, not at your face.
Keep a minimum 18 inches of clearance around all sides from anything flammable. Camping chairs, sleeping bags left on a picnic bench, paper towels stacked nearby. These cause most camp kitchen accidents and all of them are preventable.
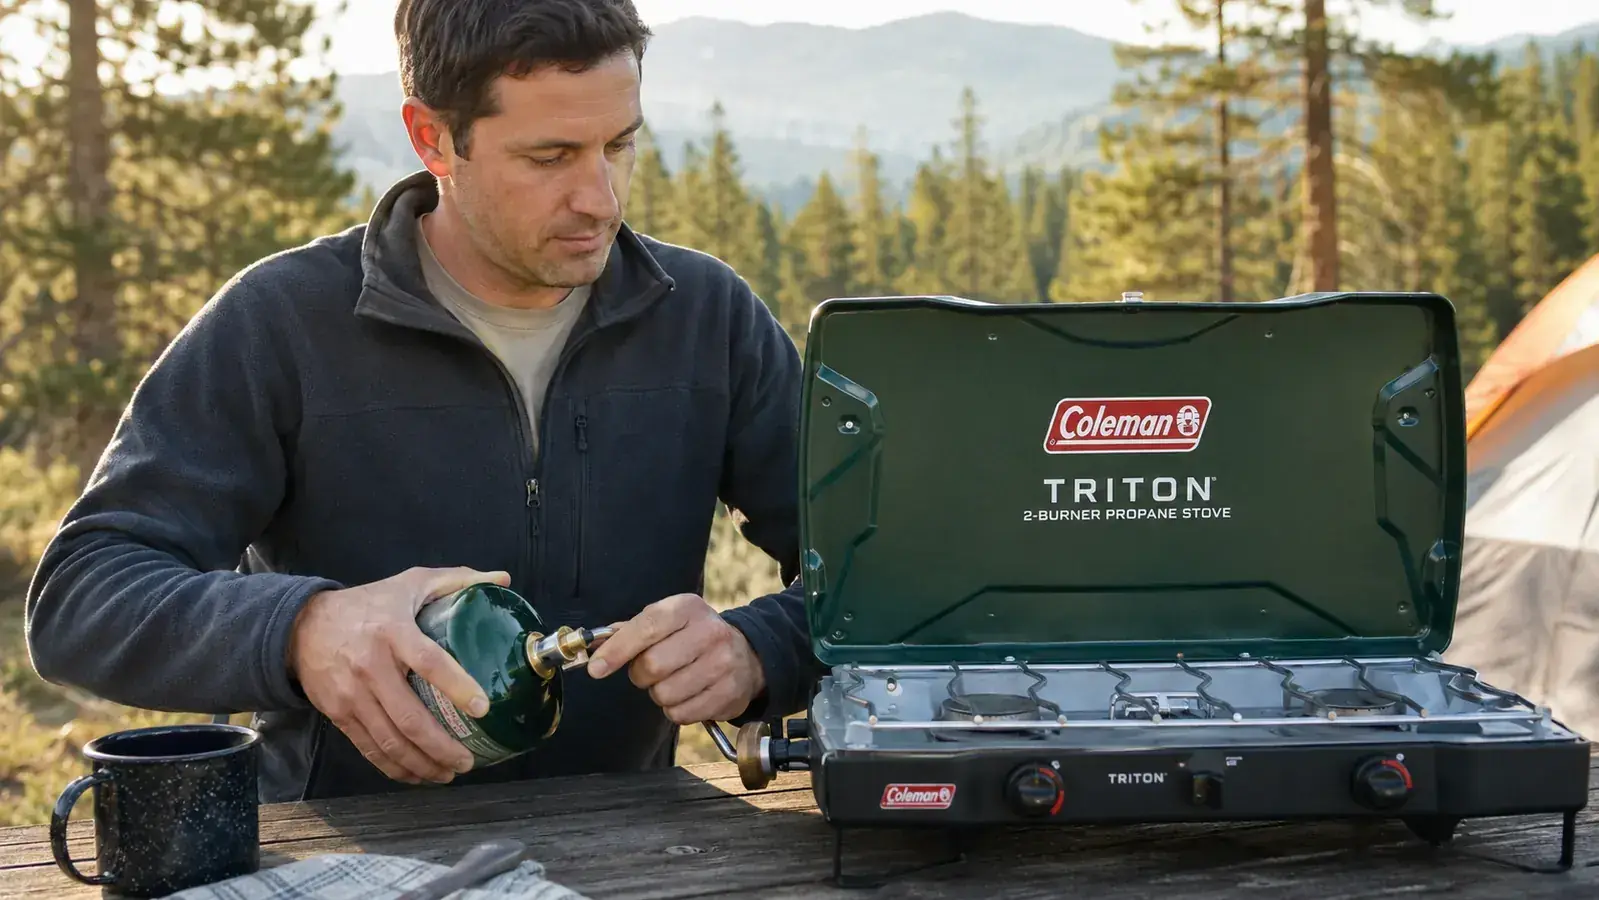
Step 2: Connect your propane canister correctly
The Triton runs on a standard 1-pound disposable propane canister or a larger tank via a hose adapter. I use the 1-pound green canisters (Coleman or Bernzomatic, both thread the same) for weekend trips, and a 5-pound tank for anything three nights or longer. A 1-pound canister gives you roughly 1.5 to 2 hours of cook time on high heat. For a three-day trip with two meals a day on the stove, bring two canisters minimum.
To connect: make sure both burner knobs are in the OFF position first. Thread the canister into the regulator valve by hand, clockwise until snug. Do not use tools. You should feel it seat firmly. Then crack one burner knob slightly to test for hissing at the connection point. If you hear a sustained hiss at the threads rather than at the burner head, unscrew and reseat the canister. A proper seal has no leak at the connection and a clean hiss only at the burner orifice.
Step 3: Learn how your two burners behave differently
This is the step most people skip and it's why camp food tastes flat. The Coleman Triton has two independently adjustable burners, each rated at 10,000 BTU on high. But in practice, outdoor wind, altitude, and ambient temperature change how the heat actually performs. At 8,500 feet with a 20-degree temperature drop from altitude, you lose roughly 15-20% of effective heat output compared to sea-level specs. Water boils slower. Sears take longer. Plan for it.
Use one burner for high-heat tasks (boiling water, searing meat, stir-fry) and the other for low-and-slow tasks (sauces, keeping things warm, melting butter without burning it). The knob dials down smoothly on the Triton, which is not true of every camp stove in this price range. I've used stoves where the low setting was still too hot for a simmer. On the Triton you can get a real low flame, and that matters when you're melting cheese without torching a quesadilla.
One practical trick: start your longest-cooking item on the high burner and move it to the low burner once it's up to temperature. Then use the freed high burner for the next component. This is basic two-burner sequencing and it's how you get a full meal done in under 20 minutes without stressing the cook.
Step 4: Prep your ingredients at home, not at the campsite
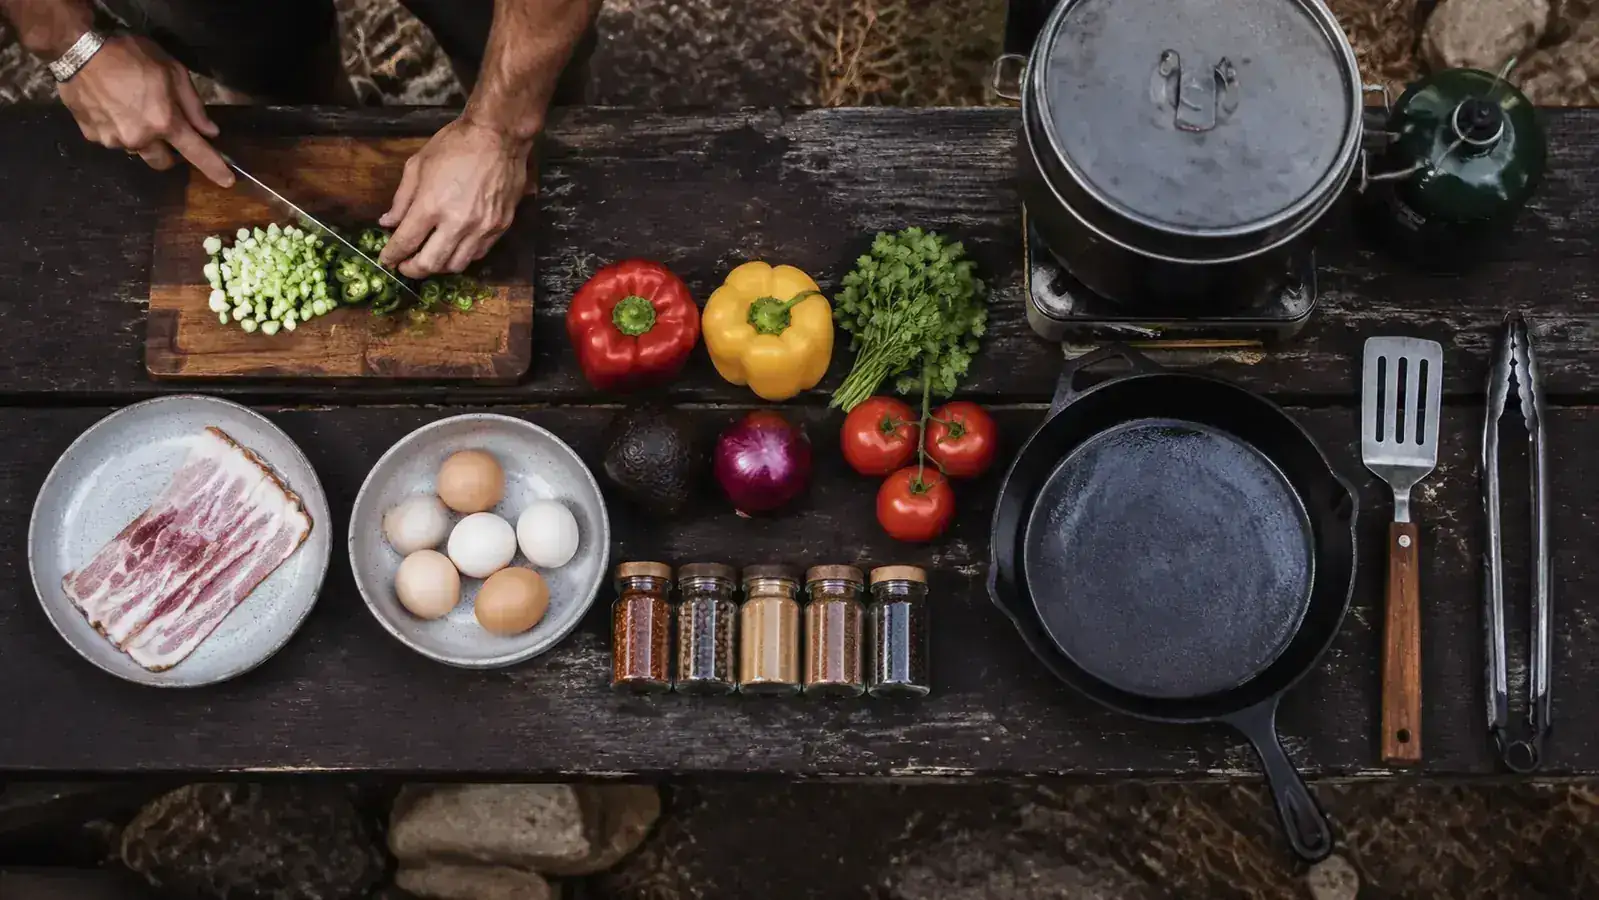
The single biggest upgrade I made to my camp cooking had nothing to do with the stove. It was doing real mise en place at home before the trip. Every vegetable chopped, every spice measured into a small container, every protein marinated and stored in a zip-lock bag. At camp, you have limited counter space, wind, flies, and usually at least one kid asking when food will be ready. This is not the time to dice an onion.
I use a small plastic spice kit with 8 labeled jars. The basics that cover 90% of camp cooking: kosher salt, black pepper, garlic powder, smoked paprika, cumin, Italian seasoning, chili flakes, and onion powder. With those eight, I can make elk chili, breakfast hash, pasta sauce, chicken stir-fry, and grilled fish. Whole spice jars from a grocery store are too bulky and half will spill in the cooler. Small, pre-measured jars are not optional.
The prep happens at home. At camp, you should be cooking, not chopping. Every vegetable I carry to a campsite is already cut, every protein already marinated. The stove is the easy part.
Proteins: I pre-marinate chicken thighs in a zip-lock and freeze them solid the night before the trip. By the time I reach camp, they've thawed and the marinade has had extra time to work. Bacon comes pre-sliced and stored flat. Ground beef for tacos goes in a sealed container already browned and seasoned, so at camp it just needs reheating. Eggs I crack at home into a lidded container for scrambles (or leave whole for over-easy). Hard-boiled eggs for snacks are peeled and bagged.
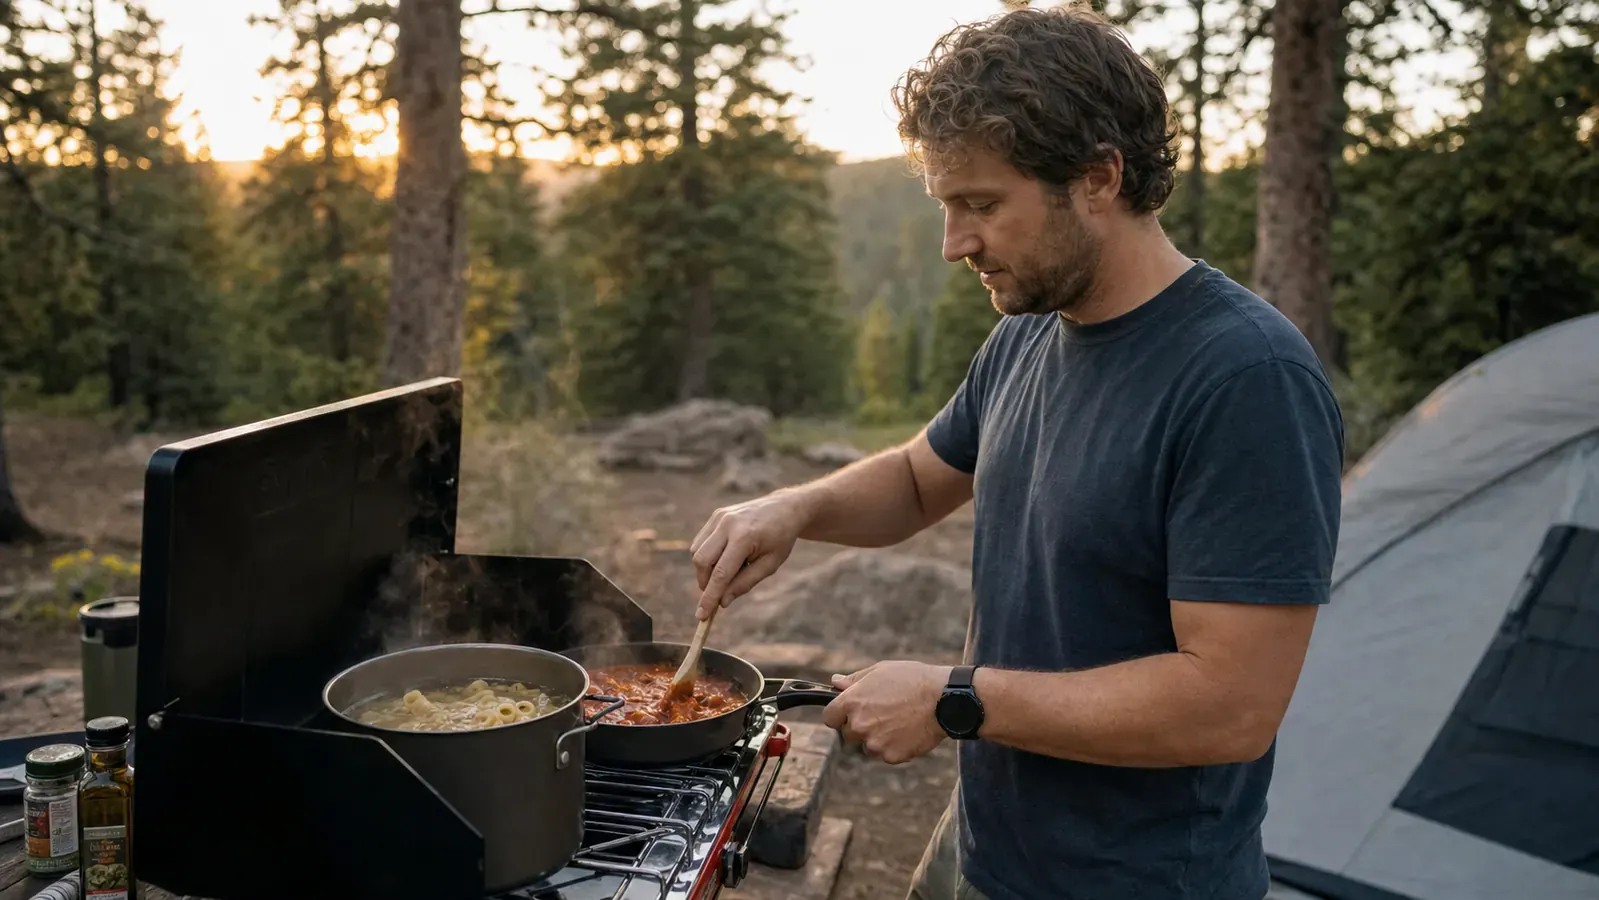
Step 5: Follow a cook order that uses both burners smartly
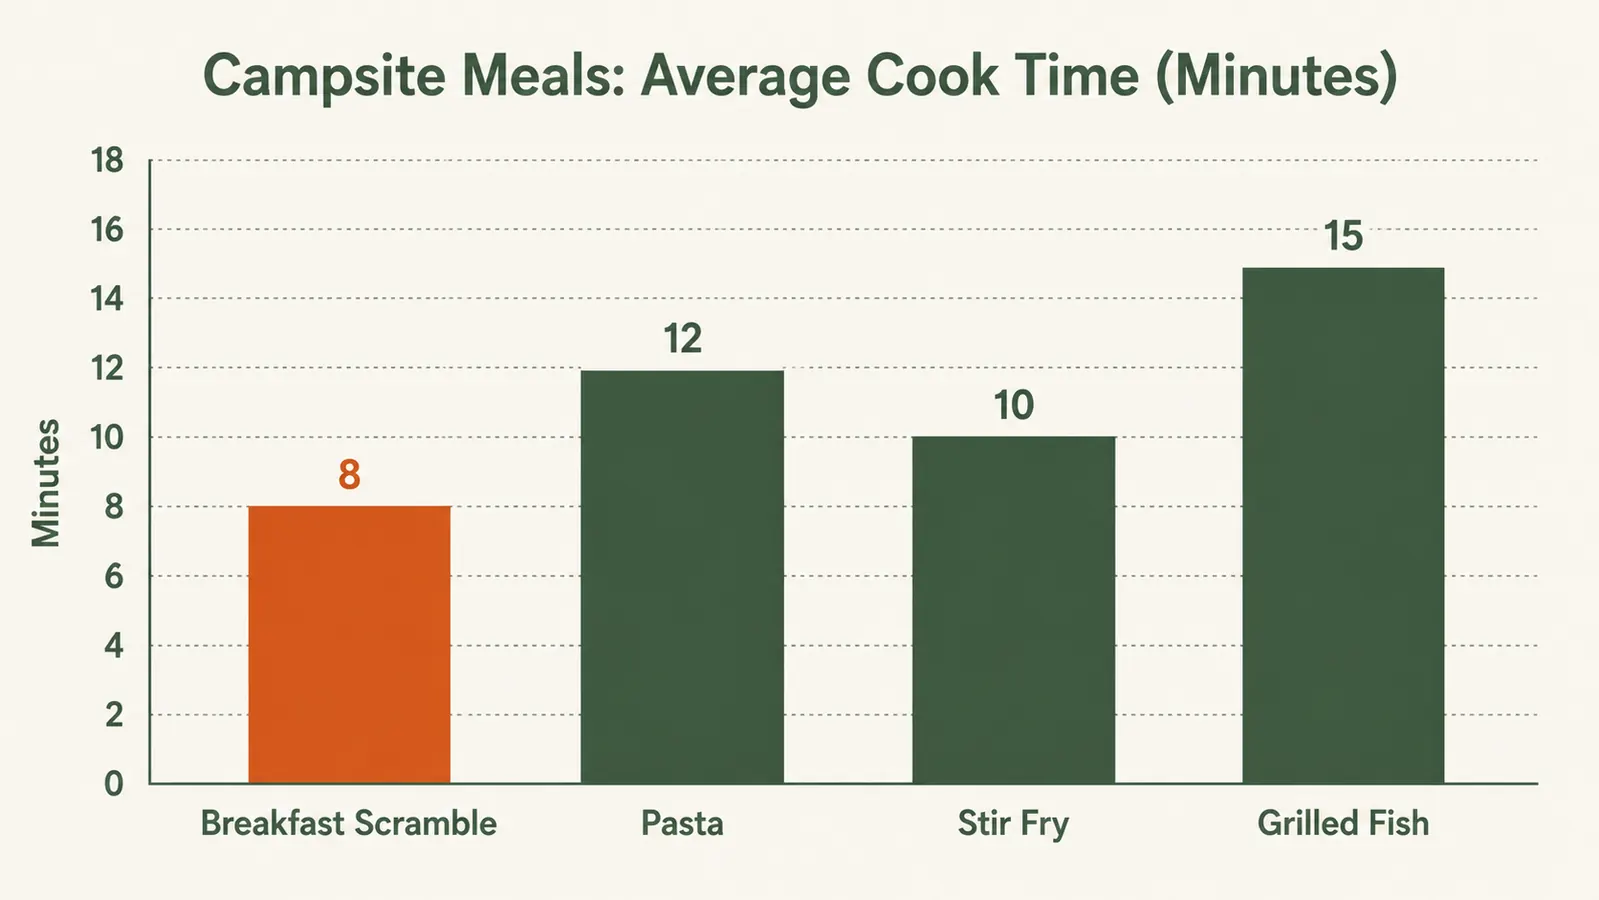
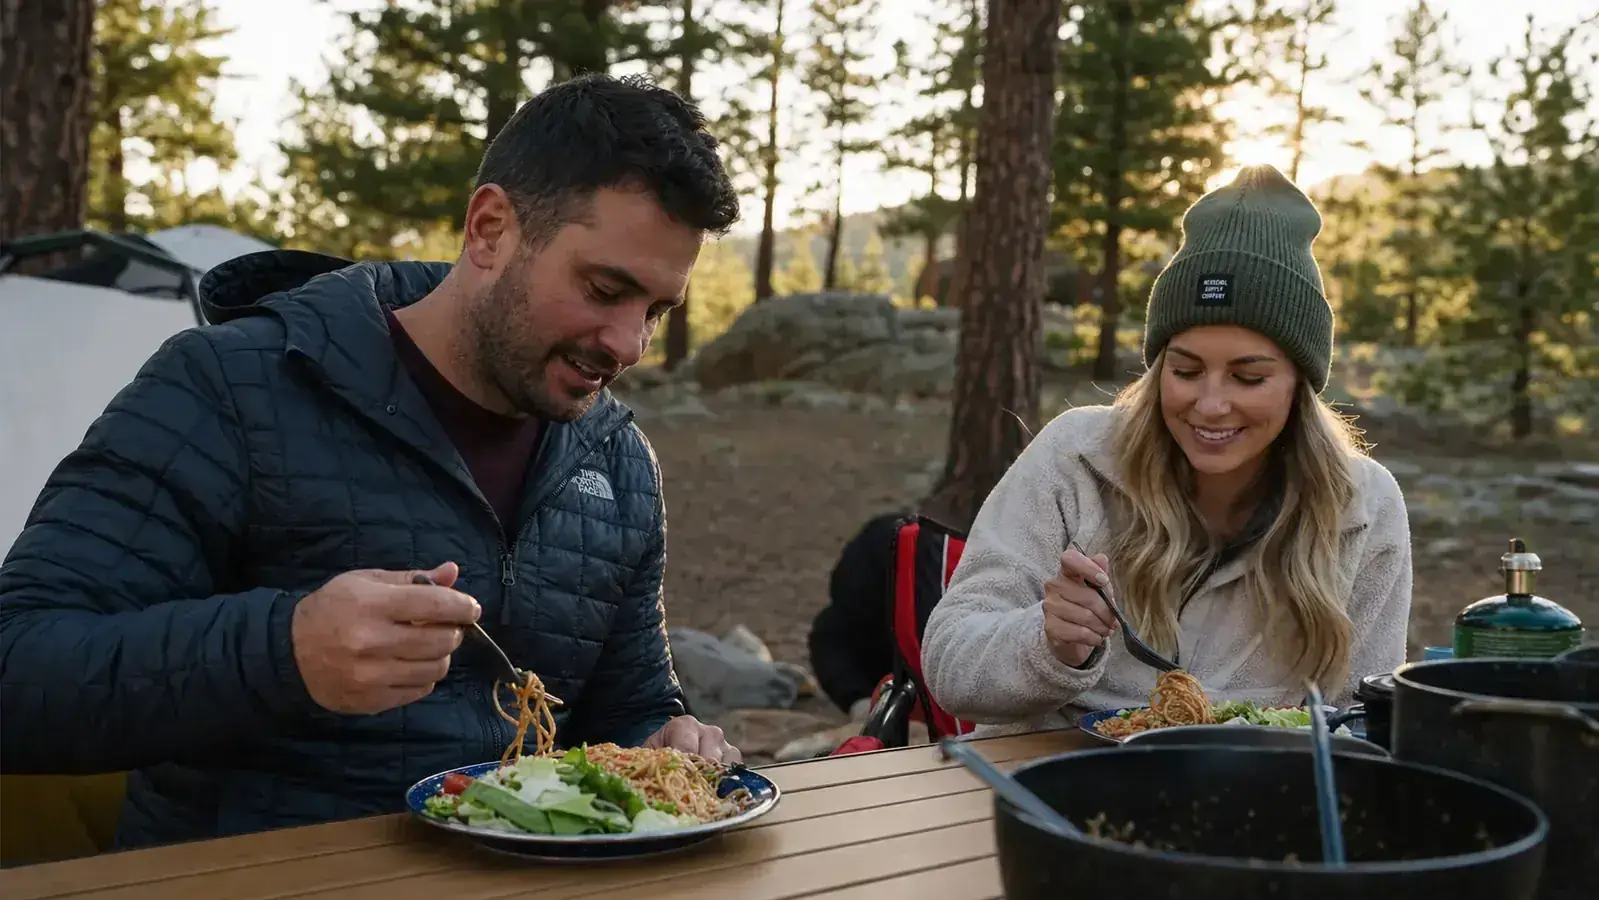
Here's the cook order I use for a standard camp breakfast for four to six people: bacon first in the cast iron on high heat, because it takes the longest and produces grease I'll use for the eggs. While bacon cooks, I put a pot of water on the second burner for coffee. Once bacon is done and resting, I drop the cast iron to medium using the dial, add the egg mixture, and put a lid on it. Coffee water goes to the side on low. I'm plating in 18 minutes from cold stove to food on the plate.
For a camp dinner like stir-fry: high burner preheats the wok for 90 seconds dry, then I add oil and protein. While protein cooks, low burner heats the sauce in a small pot. Once protein is nearly done, vegetables go in the wok and I turn the heat up. Sauce goes in last, coats everything in 60 seconds, and I pull it. Rice was cooked before the stir-fry even started and has been sitting covered and warm on the low burner. Two burners. One complete meal. This is what the Triton makes possible that a single-burner stove doesn't.
What Else Helps
The right cookware makes a significant difference on a camp stove. I use a 10-inch cast iron skillet for anything that benefits from heat retention (sears, hash, quesadillas) and a 3-quart lightweight stainless pot for everything else. The cast iron holds temperature better when you open a lid to stir, which matters because camp stoves lose heat fast when wind hits an open pan. A silicone spatula that handles high heat, a pair of long tongs, and a ladle cover 90% of camp cooking moves.
A windscreen is worth adding if you camp in exposed sites. The Triton's built-in lid guard helps, but at altitude with real wind, you'll see your boil time stretch to 10 or 12 minutes for a quart of water instead of 5. A freestanding aluminum windscreen around three sides (not four, you need airflow for combustion) cuts that back significantly. It's a $15 piece of gear that outperforms most premium stove upgrades in windy conditions.
Clean your burner heads after every trip. Grease and food debris clog the orifices over time and cause uneven flames that burn food in one spot and undercooked it in another. The Triton's grates lift off for easy cleaning. I wipe the burner heads with a damp cloth and use a toothpick to clear the orifice holes after any particularly greasy cook session. Ten minutes of maintenance extends the stove's usable life by years.
For a deeper look at how the Triton stacks up against other two-burner options and what the long-term ownership experience looks like, check the Coleman Triton long-term review. And if you're still on the fence about whether to go two-burner at all, the 10 reasons a two-burner beats a single burner breaks down the case clearly.
Ready to cook like this at your next campsite? Start with the right stove.
The Coleman Triton 2-Burner Propane Stove is the stove behind every meal in this guide. Two independently adjustable 10,000 BTU burners, a built-in wind guard, and a reputation built on 3,500+ verified reviews. It's what Marcus loads into the truck every trip.
Amazon Check Today's Price on Amazon →